Got a DJI Drone and tried it out at Peninha Monastery

Got a DJI Drone and tried it out at Peninha Monastery
The Eagle has landed.
Back home in Portugal and went out to take a few Photos at Parque Natural de Sintra. Got this one of a beautiful eagle sitting in a tree.

While not claiming to be an expert myself many people are asking me how to achieve the “freeze” effect as in my photo of “Old Jetty Piles at Lough Neagh” see below:

Well here goes:
Choose the focus of your subject on something that does not move ie. the pile posts in the water.
Water moves so this will become frozen in the image giving the effect, water is the most popular but moving car head/tail lights are another possibility. Just look for something static among moving surroundings. Water with a ripple or a moving waterfall/river/waves is best.
Set your camera to manual, very important, since the camera software will try to adjust the settings/focus to what it sees rather than what you want if it’s in automatic. Use the lowest ISO setting of your camera usually 100.
The lighting is important also and will depend on many things like time of day and atmospheric conditions. Your settings will depend on the light and if it’s calm, stormy, overcast, shade, day, night, windy or raining these will dictate these settings.
The following 10 steps should help you achieve an image with the frozen effect.
Step 1 – Set the camera up on a tripod, this is essential.
Step 2 – Choose a lens to suit the desired result, ie. wide angle for a wide landscape or a narrow lens for a close-cropped image.
Step 3 – Focus on your main static subject as sharply as possible.
Step 4 – Adjust the lens aperture to achieve the desired depth of field, ie. blurred surroundings or sharper surroundings.
Step 5 – Note the speed setting that gives the correct exposure for the image. This will probably be too fast in order to achieve the cotton candy effect of the moving water for example. Don’t change the ISO.
Step 6 – Fit an ND (Neutral Density) grey filter to the lens. This will slow the speed and be depending on the light conditions you will need to experiment with different strengths of the filter. A circular adjustable filter is good but a good quality slide in square filter is better.
Step 7 – Try to achieve a very slow speed by adjusting the filter to achieve a setting somewhere above 5 seconds but make sure the exposure remains spot on and change the filter strength if required to achieve this. Do not change focus, camera position or aperture and you will need to start again.
Step 8 – Camera shake will ruin your image so to avoid this is very important. A remote switch is perfect but if you don’t have one then set the camera shutter to activate after 2 seconds this will have the same result. Setting the camera to mirror lockup at the same time will be even better to avoid camera shake.
Step 9 – Once set up check the speed and if it is above 30 seconds you will need to set the camera to Bulb (see link). In this case, you will need to do some calculations to discover the speed timing to give the perfect exposure (there are tables online). These calculations are difficult but modern technology gives us the answer. The ultimate time setting will depend on the light/filter strength and many apps for mobile phones are available (see link). This will give a speed setting and will give a signal when reached. The only other option is to take a number of shots at different timings and look at the results which is a bit hit and miss.
Step 10 – Finally take your shot and if you have followed the above the result will be an image that can be post-processed if necessary to achieve what you desire.
Some examples.


A speed setting table.

Took some bird photos at Lough Neagh today. Summertime is over, the clocks go back and the days are getting shorter. The birds and animals are preparing for the hard winter days ahead.


A Squirrel hunting for nuts.

Some images of Autumn


Fireworks over Craigavon Lake


The benefit of living here in Portugal is that unlike many other countries pumpkin is in season all year around.
We eat it for Easter, have it as a dessert for the summer picnics, grill it on the barbecue in spring barbecues, have it in stews in December and love it when it’s traditionally eaten in October.
The leaves are falling off the trees, it is no longer 40 degrees outside and instead is just 30 and the tourists are here in their 100’s rather than the 1000’s… We can also get excited over pumpkin stews, pumpkin pie and best of all pumpkin bread.
If you’re looking for good uses out of your leftover pumpkin flesh after the kids make Halloween lanterns out of them, then this recipe is for you.
Though for me, the attraction to learning how to make your own pumpkin bread is the fact that you can dump your ingredients into the bowl, mix with your hand mixer, throw them into a baking pan inside your Actifryer, sometimes called an Airfryer and then 15 minutes later you have pumpkin bread. If you don’t have an Actifryer then follow the link to see what they are and where to get one, they are a must for anyone wanting to cut down on fat and lose weight. It’s just as easy to make this in the oven anyway if you don’t want an Actifryer.
Not to mention that the pumpkin bread takes just 5 minutes to prepare. So that means that you have delicious pumpkin bread in just 20 minutes.
This pumpkin bread is really healthy too, there is no gluten in it, no unwanted E numbers and if you want your kids eating a healthy bread for supper for when they come home from school then give them a slice of this.
I recommend that you use fresh pumpkin pureed for this recipe. We steamed our pumpkin in a pressure cooker, you could use a steamer but don’t boil it as you lose all the nutrients, drained the water and blended it with our blender. It gives a much richer flavour compared to a processed or boiled version.
If you want a sweeter version then you could either double up the honey or add some maple syrup. Either way, you have a foodie pumpkin bread heaven on your way.
I often get asked why use banana flour in my recipes. Well, the truth is that banana flour is simple to use, very healthy and in my opinion completely tasteless.
This means that when you use it as a flour in baking, you don’t have an overpowering gluten-free flour taste. So if you don’t like coconut flour (I really don’t like it) then this is your Plan B.
I use a little when I need to so that I can thicken up a dough and it seems to last forever from such a small amount. If you can’t get it in the supermarket then get it Here.
Absolutely! And even better it is 302 calories per ¼ of the pumpkin bread. Remember that is not per slice as the entire pumpkin bread makes 8 slices so that means you can have 2 slices for just 302 calories.

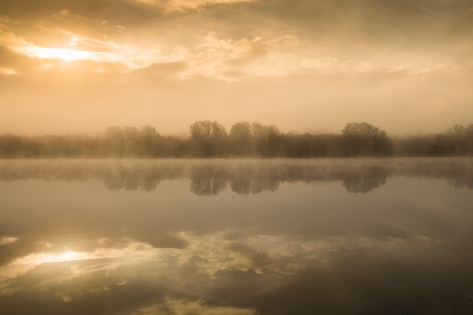
Woke up this morning and could hardly see 10 yards in front of the house but was good for some atmospheric Photos.


Ingredients:
(enough for 4)
Method:
Wash off any excess salt from the pieces of cod, put them in a large bowl and cover with at least 3 times their volume of cold water. Place the cod in the fridge for 24 hours, changing the water at least 4 times. You don’t need to remove all the salt from the fillets, just re-hydrate and remove the excess salt if in doubt pick a little bit of flesh from the centre to taste how salty it is. Peel and cut potatoes into matchstick strips, a mandolin is good for this, but if you don’t have one use a knife and cut them as thin as possible. Then fry the matchsticks in a deep pan of oil until golden. Before frying it’s best to wash off excess starch so they don’t stick to each other and drain them well. Deep fry over a high heat otherwise they’ll soften and soak up oil
If you’re trying to decide whether to use Lightroom, this Introduction video from “Lightroom Made Easy” explains why photographers need Adobe Lightroom, and how it’s different from other image editing software.
This is an easy option, plenty for two, and very inexpensive, just as good as your take away. 200 g beef shredded, 5 spring onions, 3 garlic cloves finely chopped, 1 green pepper, a hand full of bean sprouts, 1 cm ginger finely chopped, Half a sheet of noodles, A splash of soy, A few mushrooms (not compulsory), About 150 ml Black Bean sauce and Oil for cooking. In the wok add the ginger and garlic, then the onions and stir a lot. Add the peppers, stirring Add the meat, stirring. Cook for about 3 minutes or so. Add the mushrooms and cook for a further two minutes. Add the black bean sauce and the noodles. Cook for another 3 minutes and then serve. Simple!

Season the Bifanas in a bowl with salt, pepper, chopped garlic and lay the bay leaves on top.
Drizzle with the white wine and vinegar mixed together.
Let it marinate for a few hours.
Place a frying pan on the hob with the lard or oil to heat.
Drain the Bifanas and place them in the hot pan, turn with a fork and brown on both sides.
As soon as they are well done, add the marinade and let it simmer a little until it almost disappears.
They are ready to be served on a crusty bread roll with mustard and Piri-Piri or on a plate with an egg and chips.
